Your Android’s camera can do more than what you think, and today I will list 12 interesting Android camera tips and tricks that will surely help you use your phone’s camera in more interesting ways.
1. Take a photo with the volume keys
The best advice I have ever given to my wife; as quoted by my wife herself (not sure if it was a taunt or appreciation, though). On most Android phones, you can easily take a photo just by holding any of the volume keys. Taking a photo with the on-screen virtual button can be a bit cumbersome, especially while taking selfies. Using volume keys for taking pictures offer a firm grip leading to less distortion. Additionally, if you like shooting selfies with the rear camera, then it will save you from that awkward moment where you pose and try to blindly tap the virtual button without success (been there, done that).
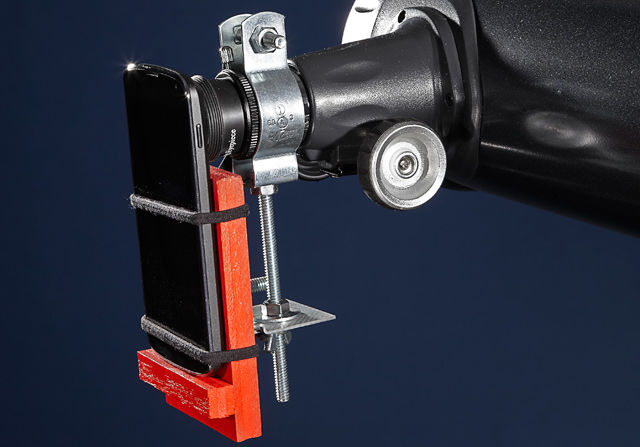
2. Zoom in using binoculars, or heck even telescope
Your phone camera can take high-quality pictures of whatever is zoomed in a binocular or a telescope’s view. Just put the phone lens in the binocular/telescope eyepiece and whatever is zoomed on the other side will show up on your phone’s screen.
Of course, it will be a little sensitive to pinpoint to the exact object, but a little practice and multiple shots should give you what you need. If you are interested in “Smartphone Astrophotography”, then check out this handy article on how to properly use your smartphone for taking pictures through a telescope.
3. Read barcodes and QR codes
Your Android phone camera can also scan and read barcodes and QR codes to interpret information. You may have already seen offers behind products asking you to scan the code to get more information, etc. Well, this information can easily be interpreted using a barcode scanner app.
There are many apps available for Android, but I personally like Barcode Scanner that is simple and makes it easy to scan both barcodes and QR codes.
4. Keep camera flash usage to a minimum
I have always kept my Android phone’s flash to “Always on” mode thinking more light leads to better pictures, boy was I wrong. The story is actually the opposite. The flash is there to help you take pictures in areas where there is no or less light, it is not a replacement for natural light or even room light. Taking pictures with the flash leads to awkward light patches in the picture and shadow disbalance. You should only use flash where there is less light and you are sure turning on the flash will help get a better photo. Simply put, treat flash as the last resort; not an enhancer.
5. Take HDR photos
You can take high-quality photos with great detail using the HDR feature of your phone. The HDR feature basically takes multiple photos of the scene and then uses areas with best light exposure to create the perfect image. If there is a bright and dark light issue in any scene, then HDR photo will offer the best results.
Most of the new Android phones come with this feature built-in, and you can also use a third-party app like HDR Camera if required.
6. Digitize photo negatives
If you have some old negatives that you want to digitize or just see what’s in them, then your phone camera may help. The negative effect available in your phone’s camera app can show the picture inside negatives with full colors. Simply hold the negatives against a light bulb and put camera lens against it. When you will turn on the negative filter in the camera app, you will see a colored picture instead. Don’t expect great quality. You cannot use this method to digitize the photos and frame them in your home. Although it’s good enough to see colored images. If you are interested in digitizing negatives with great quality, then you’ll need a few extra tools as well. Check out this DIY method to digitize old negatives with reliable quality using your smartphone camera.
7. See infrared rays
Infrared rays cannot be seen by human eyes, but your phone’s camera can see it. To test it out, simply put your phone camera against your TV remote and press any button, you should see a blue light lit up. I actually used this trick to check a dead TV remote control, it may help you as well.
Apart from TV remote controls, infrared rays are also used for many other key purposes. For example, many security systems use infrared rays that raise an alarm when anyone breaks through them. You can see those rays with your Android phone’s camera by pointing it towards them. Now only if action movie thieves knew this trick… Note: Smartphone cameras try to suppress infrared rays as much as possible for better quality photos. If you are interested in seeing infrared rays clearly, then you should check out a dedicated infrared camera app.
8. Create digital clones of yourself
Your phone’s panorama shot feature allows you to take multiple photos of a large area and stitches them together to create a single photo. This allows you to take photos of large landscapes that are otherwise too broad to fit in the lens. Now what if you were standing in each of the photos, won’t that make it look like there are multiple clones of you in a single photo? To do this, change your location with the camera as someone (maybe your friend) move the camera around to create the panorama shot. The ending result will look like there are multiple clones of you in the picture. To spice things up, you can also quickly change clothing accessories (like a cap) and your pose to make it look real.
9. Wait and focus on the right object
Your camera needs to focus before it takes that perfect photo. Many Android phone cameras take 1-2 seconds to focus after launching. So you should not take a photo immediately after launching the app. Additionally, you should also manually tell the camera what is the focus of the picture. Your phone can automatically focus on faces, but you’ll have to manually adjust focus for objects. To do this, simply tap on the object that you want to focus on and the focus frame will move to it. This will lead to high-quality photos without blurry effect.
10. Replace the default camera app
The default camera app on your Android phone is good, but there are really cool alternatives available as well. Such as Open Camera that has a comprehensive list of features, or Selfiegenic for selfie fanatics.
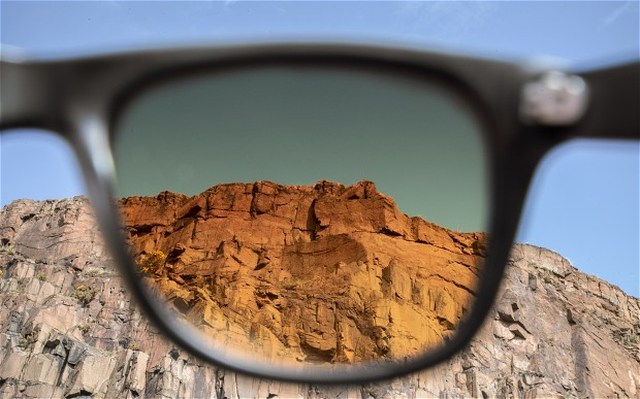
11. Add polarizing effect to your shots
If you have polarized sunglasses then you can use them to add a polarizing effect to your pictures. The resulting photo will be clearer with more depth. Simply put your sunglasses in front of the camera lens and take the photo. Of course, it is best used for areas with bright lightening, preferably outdoor daylight photography.
Even if you don’t have polarized sunglasses, you should still try this trick. The results might be very interesting as sunglasses do act as a filter.
12. Take macro photos with a drop of water
You must have seen those highly zoomed pictures where the focused object has great depth and the rest of the picture is blur. That is macro photography and usually, it requires a dedicated lens. However, you can also use water as a macro lens to do macro photography. To do so, just take a drop of water on your finger and paste it on your Android phone’s camera. No without shaking too much, take close up photo of anything you like. The result will be a macro photo with amazing depth.
The camera lens on Android phones is firmly placed and a drop of water should not be dangerous for the phone. However, if there is a speaker or microphone hole nearby, then cover it up with tape before trying this.
Summarizing
So these were some handy Android phone camera tips and tricks that should help you take better pictures or get more out of your Android phone. Seeing infrared rays and using the telescope for zooming are definitely a must-try I would say. Which one of these smartphone camera tips and tricks do you like? Share with us in the comments.


