Many of us go through this struggle on a daily basis as we don’t fully understand the amazing features that Gmail offers us. For instance, one of those amazing features is the archive feature that enables you to manage your inbox without the need to delete your emails. Instead of deleting your emails and regretting them later, you can use the archive feature to archive your emails. What it does is that it places all your archived emails in the All Mail folder. Resultantly, you can browse your important inbox emails at any time without any distraction. You can also access the archived emails at any time you like without losing them. It also helps to reduce the memory consumption of Gmail. Although you can archive emails manually by using the Archive button at the top, it can be quite cumbersome when there are dozens of emails coming every hour. To help you with this, I am going to show you how to auto-archive emails based on email type or the time it’s in your inbox.
Method #1: Creating a filter for auto-archiving the emails
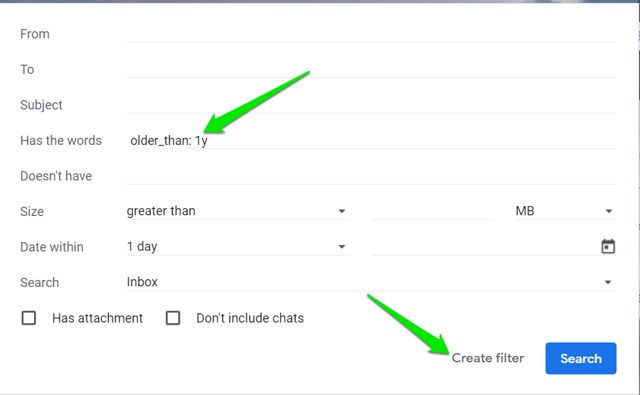
For auto-archiving your emails, first, you have to create a filter. The filter will determine what kind of emails you want to archive. Launch Gmail.com on your PC. In the search bar, type in:inbox older_than: 1y and press Enter. You can replace the 1y with the number of your likeness. Here the ‘y’ stands for a year. Use ‘m’ for month and ‘d’ for day. Next, click on Advanced search.
Again type older_than: 1y in the Has the words field and click Create filter. Then click OK.
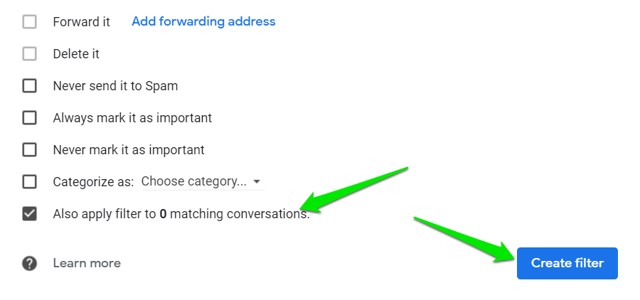
A new box will open up. Check the Skip the Inbox (Archive it) option. Also check Mark as read, if you want to mark emails older than 1 year as read.
Check the Also apply filter to matching conversations option as well and click Create filter.
After doing these steps, all your emails from 1 year ago will be marked as read, removed from your inbox, and moved to the All Mail folder.
Method #2: Create an auto-archive Label
The auto-archive label is an easy fix to archiving your emails as well. I, for one, get very annoyed by all the notifications and newsletters that arrive every five minutes! You can easily overcome this by creating an auto-archive label. The steps for creating this filter are as follows: Launch Gmail.com on your PC and go to Gmail Settings by clicking on the gear icon. Click on See all settings.
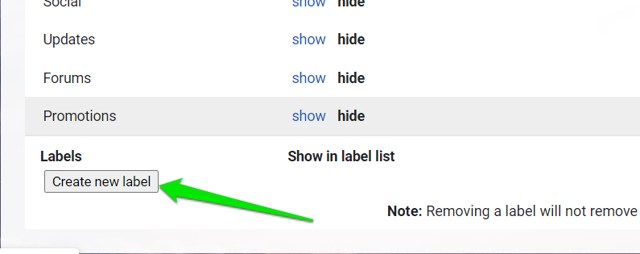
On the top, click on the Labels tab. Scroll down and click Create a new Label.
In the name field, type auto-archive and click Create.
Using the auto-archive label
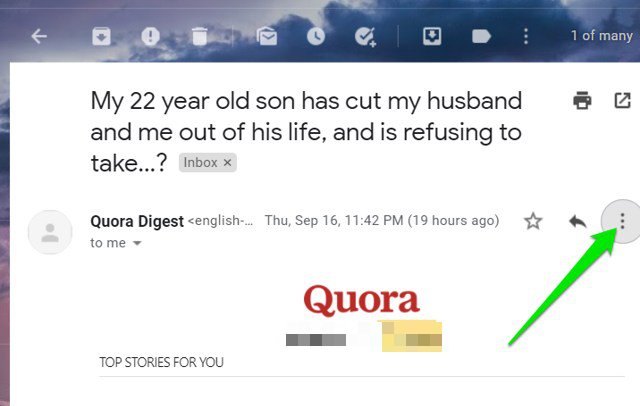
Now, having created the auto-archive label, you can use it to archive specific types of emails. For demonstration, I am going to archive emails from Quora digest. In your inbox, open an email from Quora digest and click on the three-dot menu in the top-right corner.
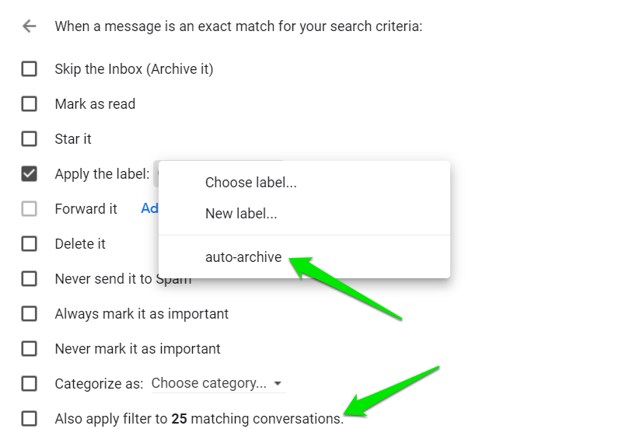
In the menu that pops open, Click on Filter messages like these. Click on Create Filter and check the box next to Apply the label option. Next, click on the drop-down menu next to Apply the label and select the auto-archive label that you recently created. Check the box next to Apply filter on matching conservations and click Create Filter.
Note: You must also check the Skip the Inbox box to move these emails from Inbox to the auto-archive label directly. Now, all the emails from Quora digest will be moved to the auto-archive folder from where they can be easily accessed.
Final Thoughts
I’d definitely recommend archiving emails automatically if you want to manage your inbox easily. Deleting your emails will not only waste your time but you may also regret it in the future. Without auto-archiving emails in Gmail, you may spend hours searching for important emails among all the unimportant newsletters and notifications. If you have any questions, let us know in the comments below.

